"DIY Silver Vinyl Wrap Projects: A Step-by-Step Guide"
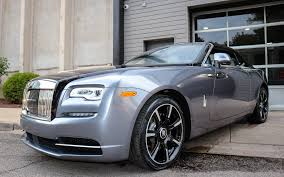
Vinyl wrapping has become a popular way to transform the appearance of various surfaces, from cars to home decor items. Silver Vinyl Wrap, in particular, offers a sleek, modern look that can enhance any project. Whether you're looking to give your car a fresh new look or add a touch of elegance to your home, this guide will walk you through the steps to achieve a professional finish on your DIY silver vinyl wrap project.
"Materials Needed:"
1. Silver vinyl wrap
2. Squeegee
3. Heat gun or hairdryer
4. Utility knife
5. Measuring tape
6. Cleaning solution and cloth
7. Masking tape (optional)
"Step 1: Prepare the Surface"
Before applying the vinyl wrap, it's crucial to prepare the surface properly. Clean the area thoroughly using a suitable cleaning solution to remove any dirt, grease, or debris. Ensure the surface is dry and smooth, as any imperfections can affect the final result.
"Step 2: Measure and Cut"
Measure the area you plan to cover with the vinyl wrap. Add a few extra inches to your measurements to account for adjustments. Carefully cut the vinyl wrap using a utility knife, ensuring clean, straight edges.
"Step 3: Position the Vinyl"
Peel off a small section of the backing from the vinyl wrap and position it on the surface. Use masking tape to hold it in place if needed. Align the edges carefully to ensure an even application.
"Step 4: Apply the Vinyl"
Gradually peel off the backing as you press the vinyl onto the surface. Use a squeegee to smooth out any bubbles or wrinkles, working from the center towards the edges. Take your time with this step to achieve a seamless finish.
"Step 5: Heat and Stretch"
Use a heat gun or hairdryer to gently heat the vinyl wrap. This makes it more pliable and easier to stretch over curves and corners. Be cautious not to overheat, as this can damage the vinyl.
"Step 6: Trim Excess Vinyl"
Once the vinyl is securely applied, use a utility knife to trim any excess material around the edges. Be precise to ensure a clean, professional look.
"Step 7: Final Touches"
Inspect your work for any remaining bubbles or imperfections. If necessary, use the squeegee and heat gun to make final adjustments. Allow the vinyl wrap to settle for a few hours before handling.
"Tips for Success:"
- Practice on smaller items before tackling larger projects.
- Work in a clean, dust-free environment.
- Be patient and take your time during application.
With these steps, you can confidently tackle any silver vinyl wrap project and achieve impressive results. Whether you're revamping your car's exterior or adding a modern touch to your home decor, silver vinyl wrap offers endless possibilities for creativity and customization. Happy wrapping!www.nascarwraps.com